
Wrangling with the new NextJS Image
I was excited to learn about NextJS's new
<Image> tag and how it offered optimization out of the box. I had struggled with images for this blog when I started; as I tried to hack ways to build it myself with next-optimized-images, while trying to grapple with when things are run on the server vs on the client. I struggled with wanting to display images flexibly within the constraints of markdown.So enter
<Image>. Everything sounded great, it seems to support making an image a background with cover or contain, which sounded useful to me. But damn, I just couldn't get it to display images the way that I wanted to.I've realized that it requires you to know the exact size of the image or container that you want. But I don't know what my images might be, especially when I'm just dropping in random images in a blog! How can I specify an exact width or height for it?! Sometimes I just want it to fill an arbitrary width at 100%. Though sometimes I want it an exact width, but I have no idea what the resulting height will be. All of their examples require some specification of height + width, if not directly on the Component, else on a div wrapping the component. I even tried to pre-calculate the images' ratios by having the server read the image file and spitting out a ratio number (width/height), and then including that ratio value when rendering exact widths and heights, that got a bit messy.
Sigh
<Image> was turning out to be very impractical and making me frustrated.So after hours of trial and error, I had to hack my way around and ended up with a bunch of
!important css overrides.For these blog images coming out of Markdown, here's what I've been doing with them.
In my Markdown, I've been wrapping my images with a shortcode, so I can optionally give them a width and some other details when rendered.
// blogpost.md

I wrote some text in this blog post markdown file! Check this out:

[[ customImage src="my-image.jpg" width="400" caption="an image appears" ]]

More rambling text.. lorum ipsum..
Then when I go to display a blog post page, I render the content with ReactMarkdown, where I can specify a plugin for remark-shortcodes), as well as rendering functions I'd like to use for the pieces that the markdown gets broken into.
Here's roughly what I'm doing.
// posts/[id].js

import ReactMarkdown from 'react-markdown/with-html';
import { ShortcodesProcessor } from './utils.js';

export default function Post({ postData }) {
  // ...
  const { content } = postData;
  return (
    <div id="blog-content">
      <ReactMarkdown
        escapeHtml={false}
        source={content}
        plugins={[
          [require("remark-shortcodes"), {startBlock: "[[", endBlock: "]]", inlineMode: true }]
        ]}
        renderers={{
          shortcode: ShortcodesProcessor,
        }}
      />
    </div>
  );
}
Some helper functions.
// utils.js

import Image from 'next/image';

function ShortcodesProcessor(codes) {
  const { identifier, attributes } = codes;
  switch(identifier) {
    case 'customImage':
      return processCustomImage(attributes);
    default:
      return null;
  }
}

function processCustomImage({ src, caption, width }) {
  // if i had specified a width, use that value; else stretch to 100% of page;
  const widthToUse = width ? `${width}px` : '100%';

  const imageWrapperStyles = {
    width: widthToUse,
    height: 'auto',
  };
  const imageElement = (
    <div style={imageWrapperStyles} className="next-img-wrapper">
      <Image src={imageSrc} alt={caption} layout="fill" objectFit="contain"  />
    </div>
    );
    return (
    <>
      {imageElement}
      <p className="caption">{caption}</p>
    </>
  );
}
When using
layout="fill", here's roughly what gets rendered. /* what nextJS generates */
<div style="display:block;overflow:hidden;position:absolute;top:0;left:0;bottom:0;right:0;box-sizing:border-box;margin:0">
<img
alt="an image appears"
src="/_next/image?url=my-image.jpg&w=3840&q=75"
decoding="async"
style="visibility: visible; position: absolute; top: 0px; left: 0px; bottom: 0px; right: 0px; box-sizing: border-box; padding: 0px; border: none; margin: auto; display: block; width: 0px; height: 0px; min-width: 100%; max-width: 100%; min-height: 100%; max-height: 100%; object-fit: contain;"
sizes="..."
srcset=" ... "
>
</div>Yeah a lot of inline styles. I'm not entirely clear why they've wrapped the ![]()
<img> in another div that's absolutely positioned. I suspect it's so they can stretch that div to a container that you give it, then have the object-fit however you specify within that.However absolutely positioning an element in something that has no exact height specified will not display anything. And this is where my problem lays.
Sometimes if I do specify a height, a
contained image will leave a ton of whitespace around it, but a covered image will get cropped off. Here are some examples:
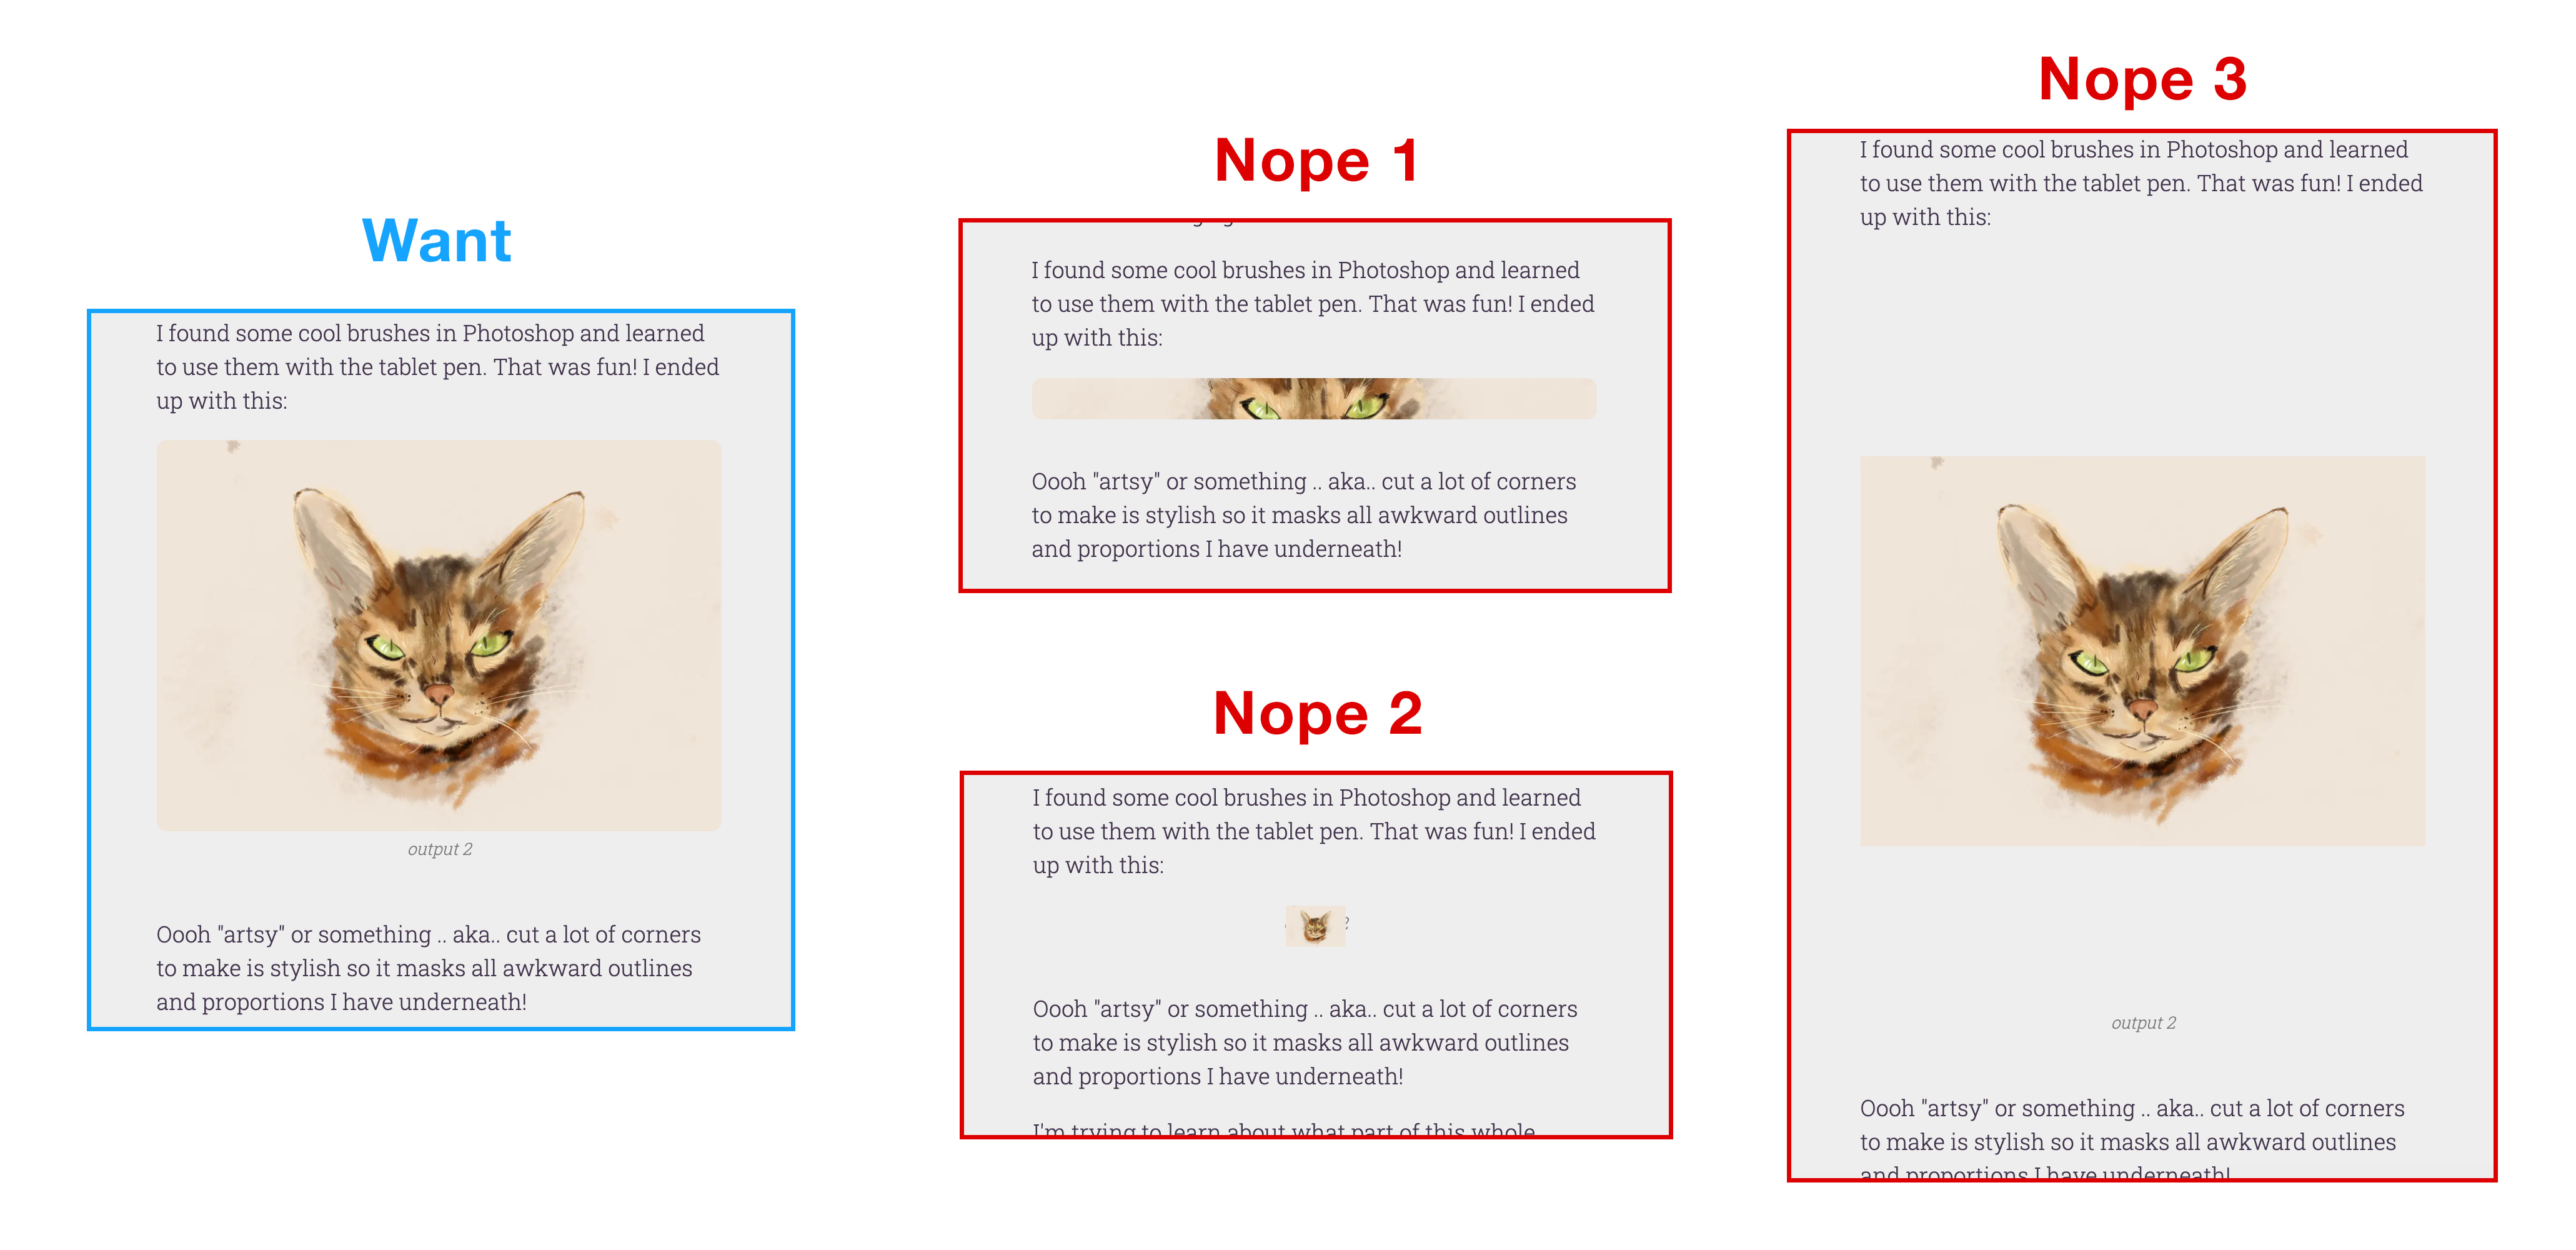
fails in using Image
Nope 1 happens when I specify
<Image layout="fill" objectFit="cover"> and using width: 100%; on the parent container and no height.Nope 2 happens when I specify
<Image layout="fill" objectFit="contain"> and using width: 100%; on the parent container and no height.Nope 3 happens when I specify
<Image layout="fill" objectFit="contain"> and using width: {some width}px; height: {some default height}px; on the parent container. An no rounded corners!So here are my CSS hacks I needed to make in order to override what
<Image> is rendering..next-img-wrapper {
position: relative;
min-width: 300px;
max-width: 100%;
text-align: center;
margin: auto;
}
.next-img-wrapper img {
width: 100% !important;
height: auto !important;
min-width: unset !important;
min-height: unset !important;
max-width: unset !important;
max-height: unset !important;
}
.next-img-wrapper > div {
position: relative !important;
}
.next-img-wrapper > div > img {
position: relative !important;
}I just want my image to fill a width I specify and have the height
auto size itself!I might be doing this all wrong. Not sure. If not I should probably open an Issue with NextJS to see if they have a better option.
Either way, I hope this hack helps someone out there!
#nextjs